How To Install Photo and Video Mobile Presets
If you’ve made it this far, you either purchased one of my new Lightroom Mobile presets, or you got lost a bit trying to install whichever preset you might’ve gotten. Either way, I got you. This tutorial will teach you to install Lightroom Mobile presets into the app directly from your smartphone, without using the desktop version at all. You will be able to save them as presets and apply them with one click.
Need help installing mobile video filters? Click here to jump down to the instructions!
Step 1: Download the DNG files to your phone
Presets for Lightroom Mobile come in a DNG file format. Most people, like me, put them in a .zip file for easy download and compressed files.
If you see a DNG file when you click on your download link, skip directly to Step 2.
If you see a ZIP file, then you need to unzip the presets first.
Unzip your DNG files directly on your phone
If you don’t want to transfer your files to your PC to unzip and then transfer then back, you can directly unzip your files on your phone by using Unzip (iOS) or iZip (iOS and android). Go to your download file and choose “Open in..” then choose Unzip / iZip.
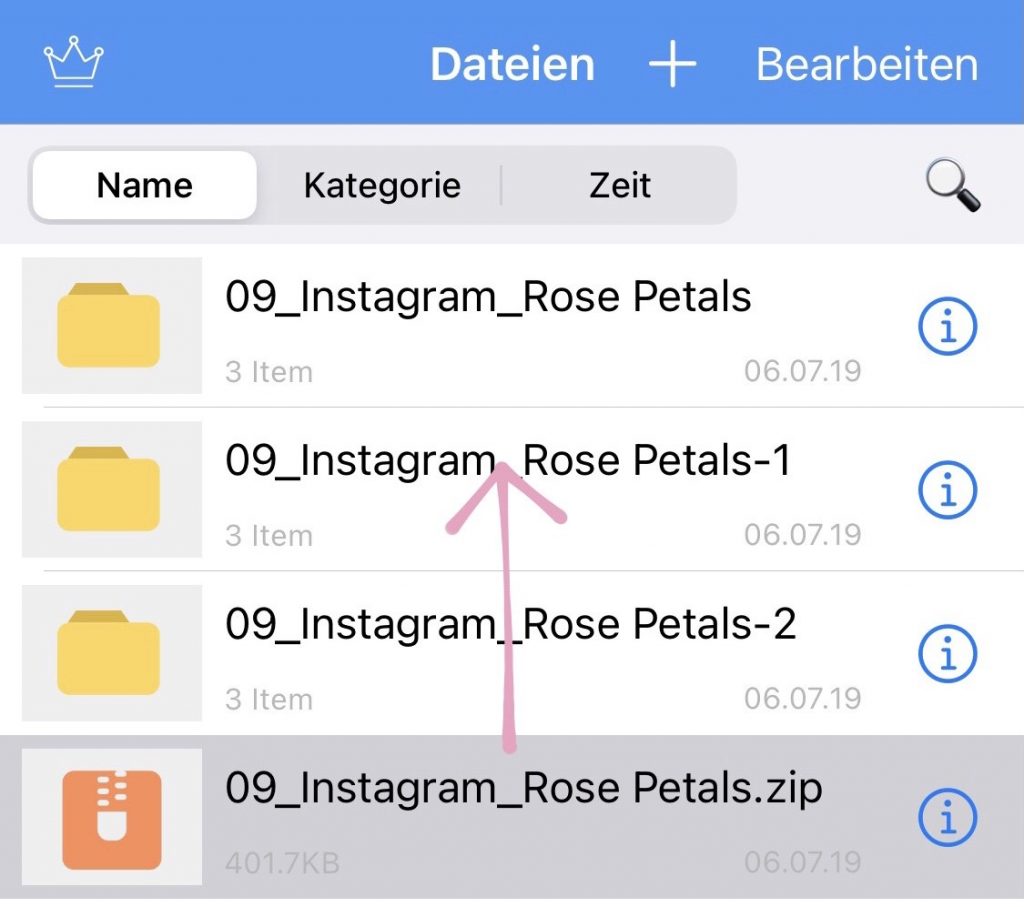
If you click on the.zip file, it will be automatically unzipped. Now you have all of your DNG files inside your Unzip or iZip app! Easy as pie. Let’s import them into Lightroom!
Step 2: Import preset files into Lightroom Mobile
At this point you should have all of your DNG files saved to your smartphone – either in your unzipping app or directly in your camera roll. The files serve as “preset carriers” and now you just need to add them to Lightroom mobile and save them as presets.
Psst, dont be alarmed if you go into your photo stream and see them as blank picture files – that’s how they’re supposed to look.
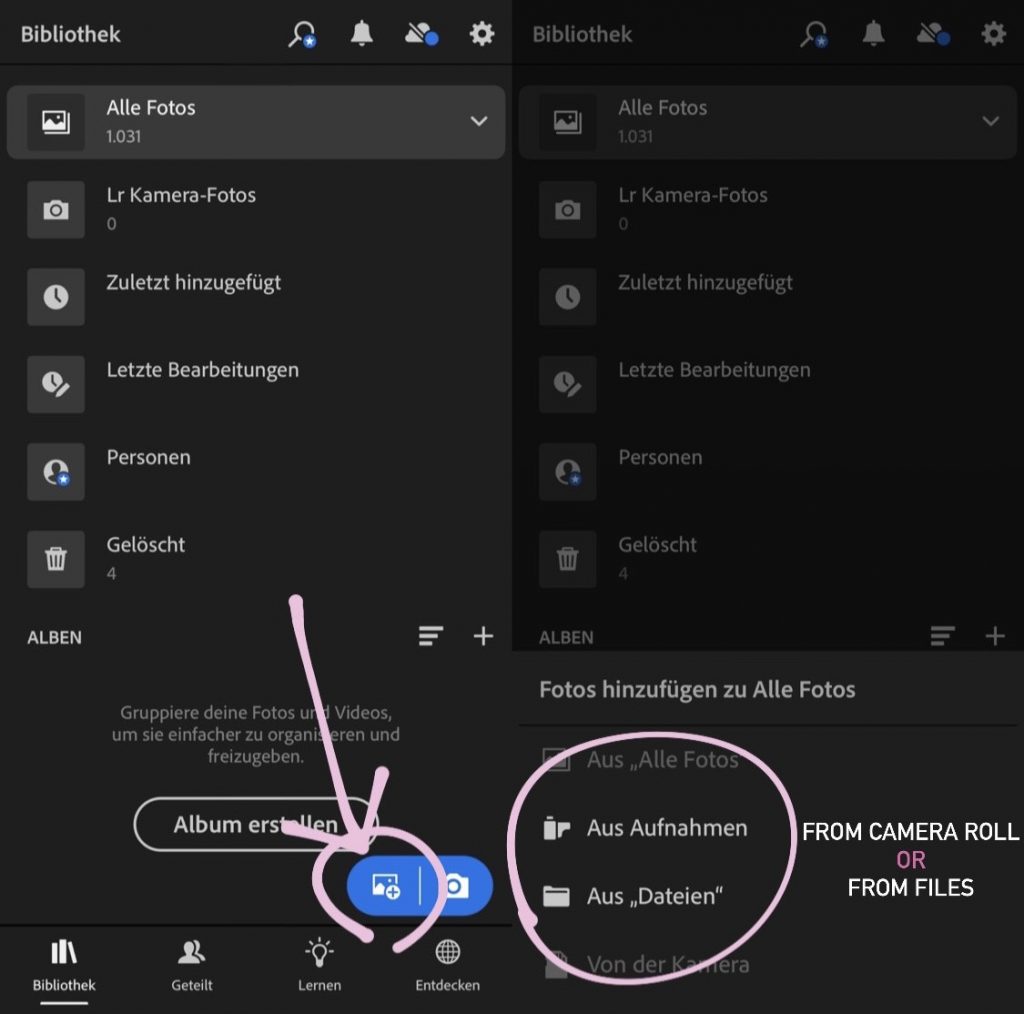
Open Lightroom Mobile and tap on the Add Photos button in the lower right corner:
Step 3: Save Settings as Presets
Now you should have all of your DNG files imported into Lightroom Mobile. Locate the files and open one of them inside the app.
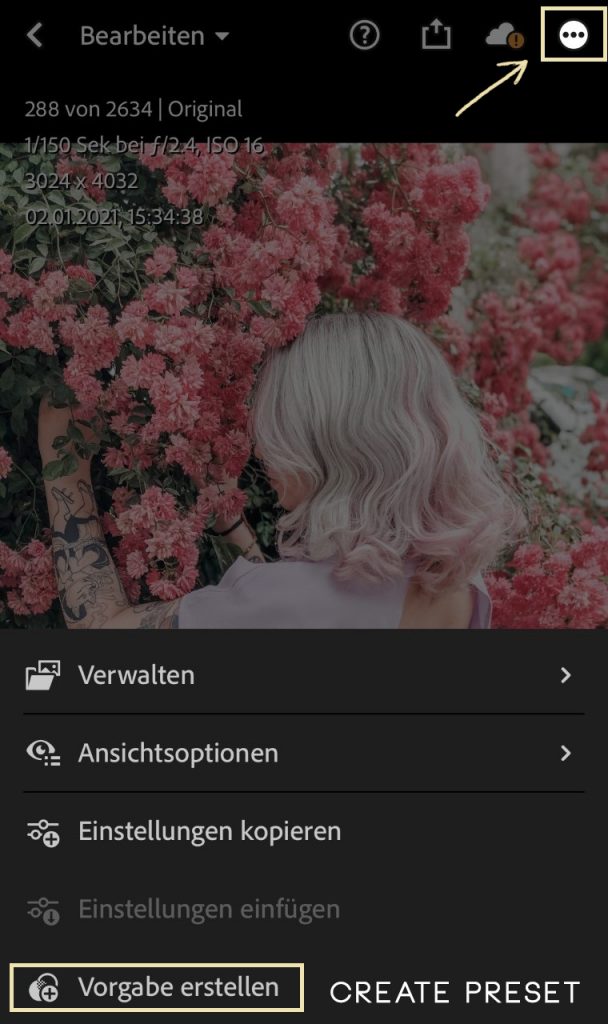
All you need to do now is to tap on the three dots icon at the top right of the screen and then tap “Create Preset”:
Name your presets (I like to name similar ones the same and number them for easier access) and you’re done! You just successfully installed your first presets 🙂
How to make the most out of your new presets
Depending on your camera setting, photography style and personal taste, it is possible that the presets will not look as desired on your unprocessed pictures.
If the overall result is too dark, I recommend to adjust the exposure and contrast a bit before adding the preset (adjust exposure -> save picture, then reload into Lightroom and use preset).
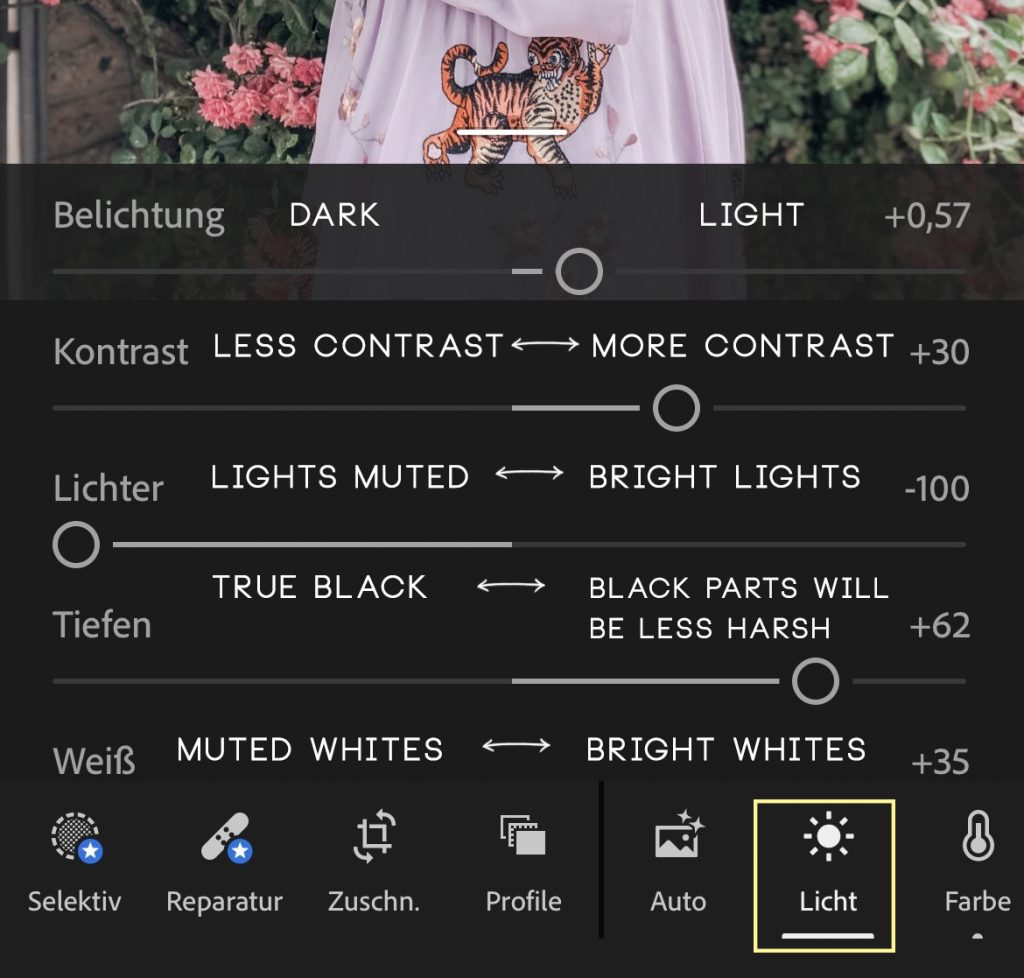
You can of course also change every setting once you applied the preset. If you feel like you always have to change the exposure with a specific preset, I recommend to save it seperately with the adjusted settings.
If your pictures turn out to be too warm or too cool toned, make sure to tweak the color settings.
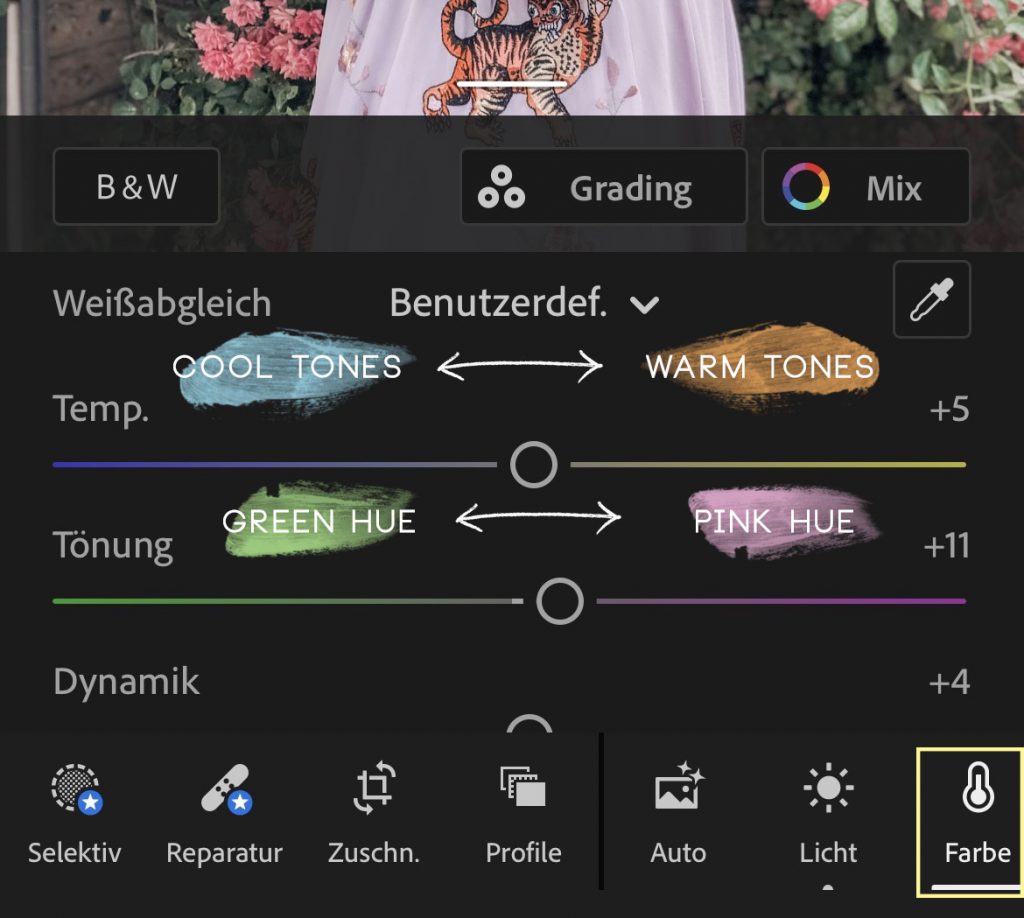
You can also adjust single colors with the “color mix” tool in Adobe Lightroom. For example, my presets often take out a lot of the yellow and green tones. To change that, you go to “color” and then on the upper right corner to “mix” and there you can adjust every single color to your preference 🙂
How to install mobile video filters (LUTs)
The mobile video filters in a .cube format will work in a variety of different video editing programs, but for ease of use we will be using the free version of the VN Video Editor App. The free version is sufficient and you don’t need to create an account. The VN Editor App is a third party app that I suggest as a free option to use the video filters. I am not in control of any updates to the VN app that affect the use of these filters. The video filters are compatible with any video editing app/software that uses the .cube format (such as After Effects, Premiere Pro, DaVinci and many more.)
Download the VN Video Editer App to your phone.
With the free version, you can create up to 100 projects. However, if you run out of space, you can just delete old projects you don’t need anymore to free up more space for editing. VN Video Editor is my favorite free video editing app for your phone.
Download the filters to your phone
After downloading the video filters to your phone through the download link provided, open the .zip file to unzip it. If you can’t find the file, go to your files and download folder and type in the name of the filters. If the download was successful, they will be showing up there. If you have problems with the .zip files on your phone, download the files on a computer and transfer them to your phone after unzipping.
Import the .cube files into VN Video Editor
Open the VN Video editor, tap the blue plus button in the bottom right corner and then swipe across the screen to the left. You are now in the Creation Kits page. From here, tap “Filters” -> “My Filter” -> “Import Filter” -> “Import from File App” and navigate to where you saved your filters on your phone and click “Open”.
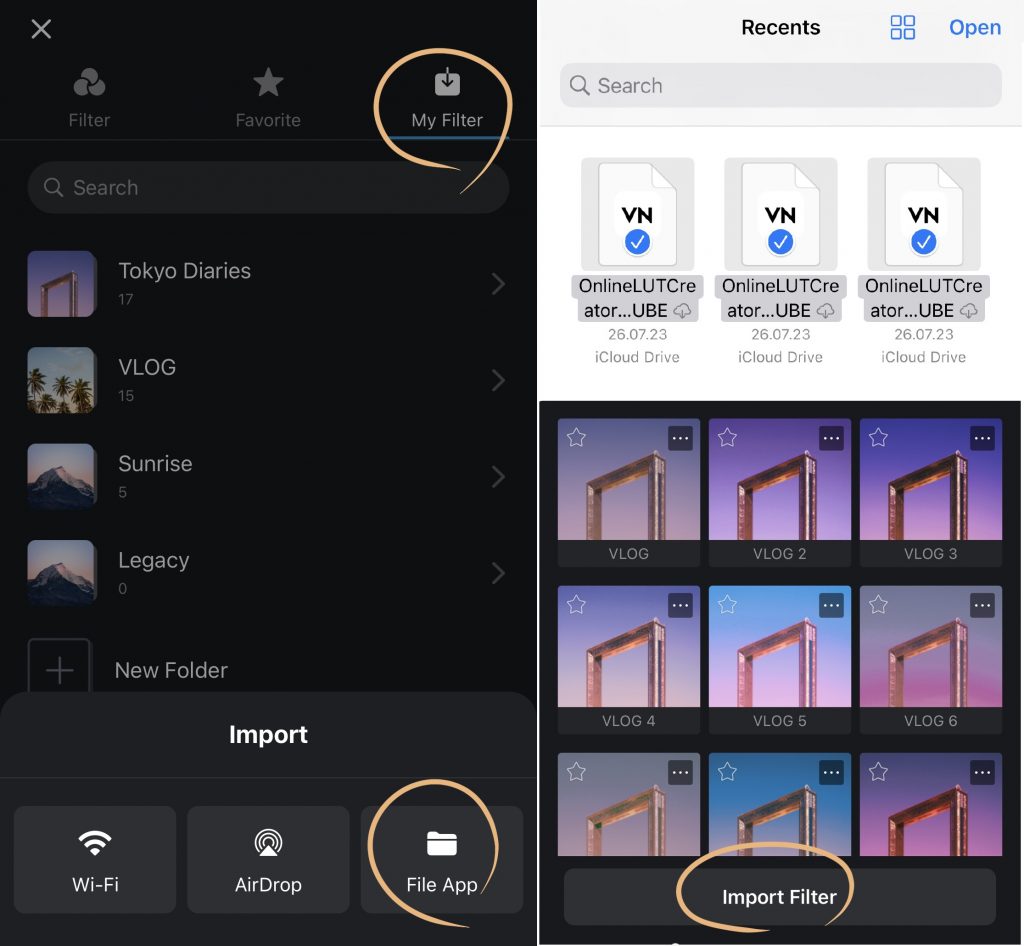
If you cannot find the files on your phone or you cannot open them, download the files to a computer, unzip them and transfer them to your phone. You can also import these filters via Airdrop.
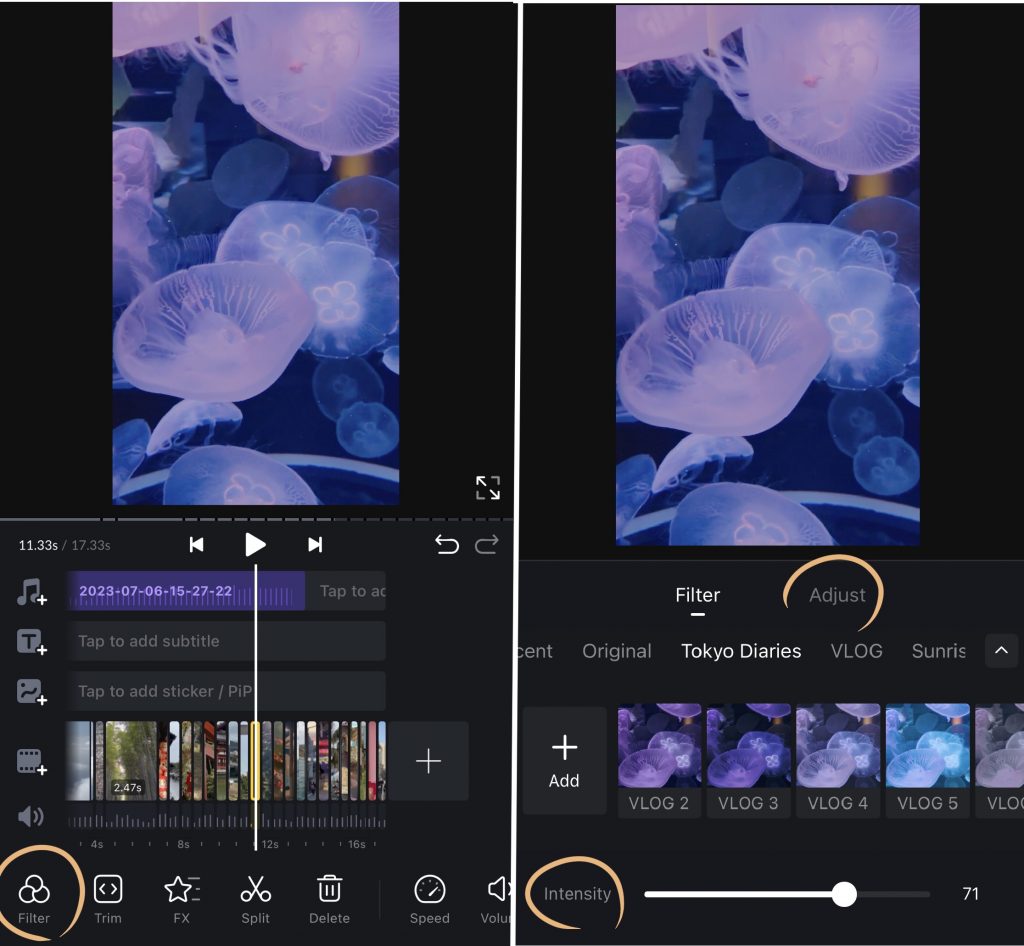
From here, tap on “New Folder“, give it a cute name and finally tap “Create Filter Library“. Yay, you’re done! Now you can access your filters while editing your videos if you tap on “Filter“.
Have fun with your new video filters!
The reason why I love these filters so much is that you have full control of the editing process. Not only can you vary the intensity of the filter by dragging the slider up and down, you can also fully adjust the filter to your liking to make sure that these will look good on any of your videos. If the filters are too bright, dull, dark or the colors are off, tap on “Filter” and then on the top right side hit “Adjust”. Here you can customize pretty much anything about these filters and even have control over every single color via the “HSL” setting. Have fun stepping up your video editing game!
If you have any questions about your new mobile filters, feel free to shoot me a comment here or a DM on insta. It would mean a lot to me if you could give me feedback on how you like these filters so I can keep it in mind when working on new ones! <3
Lots of love,
Sam